Most people think baking is complicated. It isn’t — it just has rules. In 2025, customised cake orders jumped 34% (Business Research Company, 2025), and 65% of US consumers already bake at least once a week (Wifitalents Baking Statistics, 2026). What separates a confident home baker from someone who’s afraid to open the oven door? A handful of core techniques — and knowing exactly which ones apply to cakes versus tarts.
This guide breaks both down from scratch. You’ll get three beginner recipes, the most common mistakes explained (and fixed), and a clear map of the skills you’ll reuse every time you bake.
Key Takeaways
- Cakes rely on leavening agents and aerated batter; tarts rely on a firm shortcrust pastry shell — the methods are different from the first step.
- Blind baking (pre-baking the tart shell without filling) is the single most important technique to prevent a soggy base.
- In 2025, custom cake orders rose 34% (Business Research Company, 2025) — home bakers are doing more ambitious work than ever.
- The creaming method (butter + sugar first) is the foundation of most cake batters; the rubbing-in method (fat into flour) is the foundation of most pastry.
- You don’t need a stand mixer or specialist equipment to make either — a bowl, a whisk, and a tart tin will take you far.
What Makes a Cake a Cake?
A cake is a leavened, aerated bake — meaning air or gas is deliberately trapped in the batter so it rises and sets with a soft, springy crumb. In 2025, the global cakes and pastries market was valued at $127.3 billion and is projected to reach $171.6 billion by 2034 (GM Insights, 2025), a sign that people’s love of cake shows no signs of cooling. That appetite starts at home, with a few basic ingredients.
Most classic cakes — sponge, Victoria sandwich, butter cake — are built around three things:
- Fat (usually butter) for richness and moisture
- Eggs for structure and lift
- Leavening (baking powder or baking soda) for rise
The method matters as much as the ingredients. The creaming method — beating butter and sugar together until pale and fluffy before adding eggs and flour — is the backbone of most home cake recipes. That creaming step isn’t just mixing: it’s forcing air into the fat, which expands in the oven and gives your cake its lift.
What we noticed: Skipping even 2 minutes of creaming time produces a noticeably denser crumb. If your butter and sugar still look yellow and grainy rather than pale and fluffy, keep going — this step is worth the extra time.
What Makes a Tart a Tart?
A tart is an open pastry shell with a filling — custard, fruit, lemon curd, frangipane, or ganache. Unlike a cake, it doesn’t rely on leavening at all. The base is shortcrust pastry, a crumbly, firm shell made by the rubbing-in method: working cold fat into flour with your fingertips until it resembles breadcrumbs, then binding it with just enough cold water to bring the dough together.
The golden rule: keep everything cold. Warm hands, warm butter, or warm water will melt the fat before it can coat the flour particles, giving you tough, greasy pastry instead of a crisp, crumbly shell.
Once the pastry is in the tin, most tart recipes call for blind baking — baking the empty shell before any filling goes in. This is the step most beginners skip, and it’s why they end up with a soggy base. Line the raw pastry with baking paper, fill it with ceramic baking beans or dry rice, and bake at 180°C / 350°F for 15 minutes. Remove the paper and beans, then bake for another 5 minutes to crisp the base.
According to Paul Hollywood’s Fixing Mistakes guide, a soggy bottom almost always comes down to two things: insufficient blind baking and using glass or ceramic dishes instead of metal — metal conducts heat faster and crisps the base properly.
Our finding: A metal tart tin placed on a preheated baking sheet dramatically improves base crispness — the hot sheet essentially fries the pastry bottom from below.
Cake vs. Tart: Core Techniques at a Glance
These two bakes share many ingredients but use almost opposite methods. Here’s a visual breakdown:
Understanding which column you’re working in before you start mixing is the single biggest time-saver in baking. It tells you whether to pull butter out of the fridge an hour early (cake) or keep it ice-cold until the last second (tart).
3 Beginner-Friendly Recipes to Start With
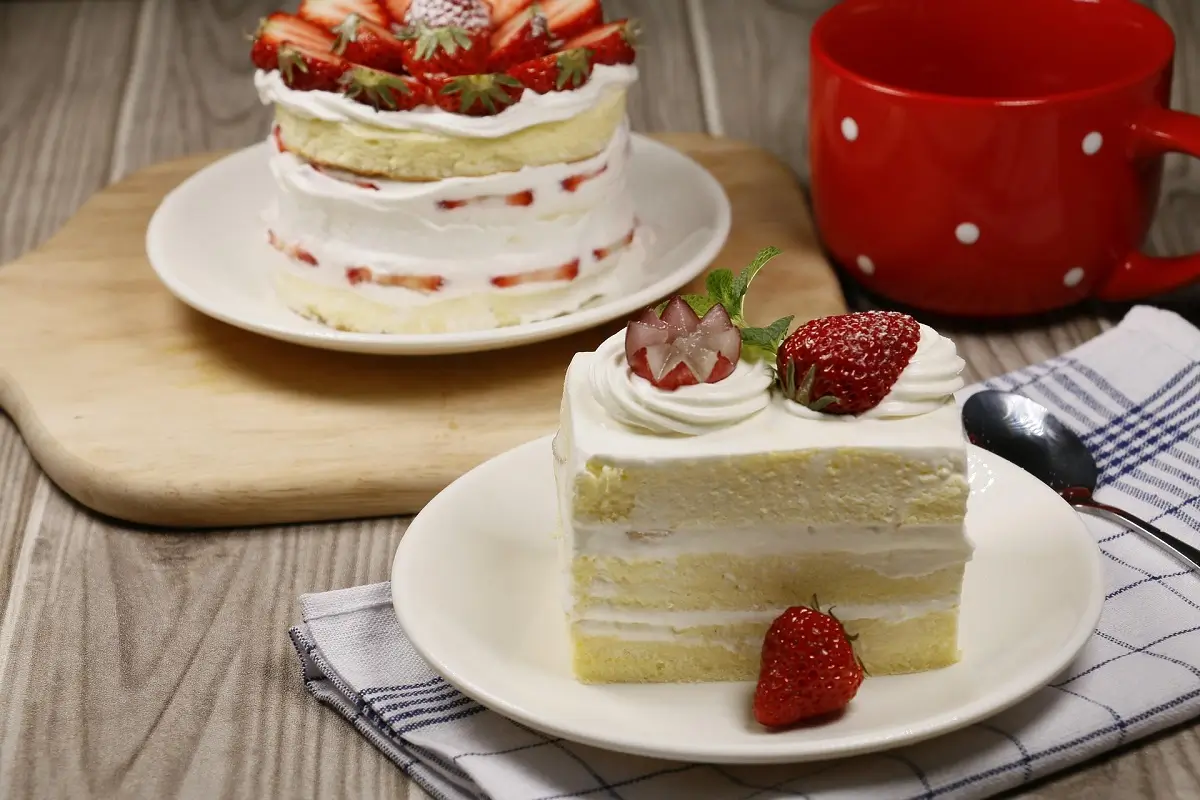
Recipe 1: Classic Vanilla Sponge Cake
Makes: one 20cm / 8-inch round cake | Time: 45 minutes
Ingredients:
- 225g / 1 cup unsalted butter, at room temperature
- 225g / 1 cup caster sugar
- 4 large eggs
- 225g / 1¾ cups self-raising flour (or plain flour + 2 tsp baking powder)
- 1 tsp vanilla extract
- 2-3 tbsp milk
Steps:
- Preheat your oven to 180°C / 350°F. Grease and line two 20cm round tins.
- Beat butter and sugar together for at least 5 minutes until pale, fluffy, and almost white in colour. Don’t rush this.
- Add eggs one at a time, beating well after each. If the mixture looks curdled, add a spoonful of flour — this brings it back.
- Fold in the flour gently using a large metal spoon or spatula. Fold, don’t stir — you’re preserving the air you worked hard to create.
- Add vanilla and enough milk to bring the batter to a slow dropping consistency (it should fall off the spoon in 3-4 seconds).
- Divide between tins and bake for 20-25 minutes. Don’t open the oven in the first 15 minutes.
- The cake is done when a skewer comes out clean and the surface springs back when pressed lightly.
- Cool in the tins for 10-15 minutes, then transfer to a wire rack. Never cool a cake in a sealed tin — condensation makes the base sticky.
Fill and finish: sandwich with buttercream or whipped cream and strawberry jam.
Recipe 2: Classic Shortcrust Tart Shell
Makes: one 23cm / 9-inch tart shell | Time: 30 minutes + 30 minutes chilling
Ingredients:
- 200g / 1½ cups plain flour
- 100g / 7 tbsp cold unsalted butter, cut into small cubes
- Pinch of salt
- 1 tbsp icing sugar (for sweet tarts)
- 2-3 tbsp ice-cold water
Steps:
- Combine flour, salt, and icing sugar in a bowl. Add the cold butter cubes.
- Rub the butter into the flour using your fingertips — lift the mixture and let it fall to keep it aerated. Work quickly; you don’t want to warm the butter. Stop when the mixture looks like coarse breadcrumbs.
- Add ice-cold water one tablespoon at a time, mixing with a knife until the dough just comes together. It should not be sticky.
- Shape into a disc, wrap in cling film, and rest in the fridge for at least 30 minutes. This step relaxes the gluten and prevents shrinkage.
- Roll out on a lightly floured surface to about 3mm thickness. Line your tart tin, pressing gently into the corners. Don’t stretch it — stretched pastry shrinks.
- Prick the base all over with a fork. Line with baking paper and fill with baking beans or dry rice.
- Blind bake at 190°C / 375°F for 15 minutes. Remove paper and beans, then bake a further 5-8 minutes until the base is dry and just golden.
Your shell is now ready for any filling: lemon curd, custard, ganache, or fresh fruit with glaze.
Recipe 3: Easy Lemon Tart Filling
Fills one blind-baked 23cm shell | Time: 35 minutes (plus cooling)
Ingredients:
- 3 large eggs + 2 yolks
- 150g / ¾ cup caster sugar
- Zest and juice of 3 lemons (about 120ml / ½ cup juice)
- 150ml / ⅔ cup double / heavy cream
Steps:
- Whisk eggs, yolks, and sugar until combined — don’t whip to a foam, just mix.
- Stir in lemon zest, juice, and cream.
- Pour the filling into the warm (not hot) blind-baked shell. A warm shell absorbs a little of the filling and prevents a gap forming.
- Bake at 160°C / 320°F for 25-30 minutes. The tart should have a very slight wobble in the centre when you move the tin — it will set fully as it cools.
- Cool completely at room temperature before slicing. Refrigerate if serving later.
The Tools You Actually Need (and What to Skip)
You don’t need much. The items below will cover every recipe in this guide and most others you’ll try:
Essential:
- Two 20cm / 8-inch round cake tins — for layered cakes and single rounds
- One 23cm / 9-inch loose-bottomed tart tin — the loose base is critical for removing the tart without breaking the shell
- Digital kitchen scales — baking is chemistry; measuring by weight is far more reliable than cups
- Hand mixer or stand mixer — a hand mixer is fine to start; the main job is the creaming step
- Wire cooling rack — non-negotiable; cooling on a flat surface traps steam and makes bases soggy
- Baking paper and baking beans — for blind baking
Nice to have eventually:
- Kitchen thermometer (for checking internal temperatures)
- Pastry blender (speeds up the rubbing-in method)
- Ceramic tart weights (more even than rice or dried beans)
Skip for now:
- Cake release spray (butter + flour works just as well)
- Silicone moulds (they don’t conduct heat well enough for tarts)
- Specialist piping equipment (master the bakes first)
The Most Common Mistakes — and How to Fix Them
Most baking failures come down to four problems. Here’s what’s actually going wrong and what to do about it:
1. Sunken cake in the middle
The oven is likely too hot, too cold, or you added too much leavening. According to Food Network’s baking guide, the correct ratio is 1 to 1¼ teaspoon baking powder per cup of flour — more than that and the bubbles over-expand, then collapse. Always use an oven thermometer; most home ovens run 10-20°C hotter or cooler than the dial says. And don’t open the oven door before the 15-minute mark.
Fix after the fact: Level the top and frost it, or fill the dip with whipped cream and fruit so it looks intentional.
2. Soggy tart base
You either skipped blind baking, didn’t bake for long enough, or used a glass dish. Glass and ceramic don’t conduct heat efficiently enough to crisp pastry. Use a metal tin on a preheated baking sheet, and make sure the base looks dry and feels firm before you add any filling.
3. Tough, chewy pastry
Either the butter was too warm, you overworked the dough, or you added too much water. Every extra minute of handling develops gluten and toughens the pastry. Mix until it just comes together — no further.
4. Curdled cake batter
Cold eggs added to creamed butter cause the fat and liquid to separate. Take your eggs out of the fridge 30 minutes before baking, and add them slowly — one at a time. If it curdles anyway, a tablespoon of flour stirred in will usually bring it back.
2026 Baking Trends Worth Trying at Home
In 2026, 71% of consumers say texture is a key driver of food enjoyment (Bakery and Snacks, 2025), and online conversations about crunchy and crusty textures rose 19% year over year. That shift shows up clearly in what home bakers are experimenting with. Here are four trends worth trying with the skills you’re building:
Sourdough-inspired cakes and tarts:
Adding a small amount of sourdough discard (the portion you’d normally throw away when feeding your starter) to a sponge cake or tart pastry adds depth of flavour and a subtle tang. Start with 50-100g discard per recipe, reducing the liquid by an equivalent amount.
Texture contrasts:
The 2026 trend toward textured bakes translates beautifully to tarts — a crisp pastry shell with a silky custard filling is already a texture contrast. Try adding a layer of caramelised nuts between the shell and custard, or a coarse crumble topping over a fruit tart.
Protein-enriched baking:
Searches for high-protein desserts grew 282% year over year (Puratos Taste Tomorrow, 2026). A practical home approach: replace 20-30% of the flour in a sponge cake with almond flour, which increases protein while keeping the crumb moist.
Vegan adaptations:
Swapping eggs in cakes for flax eggs (1 tbsp ground flaxseed + 3 tbsp water per egg) or aquafaba (3 tbsp whipped chickpea liquid = 1 egg white) is now well-tested territory. Vegan tart pastry is naturally easy — most shortcrust pastry works with cold vegan butter 1:1.
A Note Before You Bake
The most important thing about baking a cake or a tart isn’t the recipe — it’s reading the whole recipe before you start. Ingredients at the wrong temperature, fillings added to a hot shell instead of a warm one, or a tart tin you don’t have in the cupboard: these are the things that derail a bake, not complicated techniques. Give the recipe a full read, pull cold butter out (or keep it cold) as needed, and preheat your oven at least 20 minutes before you use it.
Do that, and you’re already ahead of most first-time bakers.
Frequently Asked Questions
Is a tart the same as a pie?
Not quite. A tart has an open top, while a pie is usually covered with a pastry lid. Tarts are also typically made in shallow, straight-sided tins, while pies are deeper and often have sloping sides. Both use pastry bases, but tarts tend to have finer, crisper shells — particularly the sweet shortcrust style used for dessert tarts.
Which is easier to make: a cake or a tart?
For most beginners, a simple sponge cake is more forgiving than a tart shell. Cake batter is harder to over-mix and easier to correct mid-recipe. Shortcrust pastry has a narrower margin — too much handling, butter that’s too warm, or too much water will toughen it. Start with the sponge cake in this guide, then try the tart shell once you’re comfortable reading your oven.
Why did my tart shell shrink in the tin?
Pastry shrinks when it’s stretched into the tin rather than eased in, or when it hasn’t been rested in the fridge long enough. Always rest the dough for at least 30 minutes before rolling. When lining the tin, lift and lower the pastry gently rather than pressing it against the sides — let gravity do the work.
Can I make tart pastry ahead of time?
Yes — shortcrust pastry keeps well in the fridge for up to 3 days, or in the freezer for up to 3 months. Wrap the dough tightly in cling film and label it with the date. Defrost overnight in the fridge before rolling. You can also blind-bake the shell a day ahead and store it at room temperature in the tin.
How do I know when a cake is done without a skewer?
Three signals together: the cake has pulled away slightly from the sides of the tin, the surface springs back immediately when pressed lightly in the centre, and a skewer or cocktail stick inserted into the middle comes out clean with no wet batter. If the skewer has wet batter, give the cake 5 more minutes before checking again.
Conclusion
Cakes and tarts are different bakes with different methods — but they build on the same core skills. Master the creaming method and you can make almost any cake. Master the rubbing-in method and blind baking, and most tarts follow naturally. The three recipes above are designed to be tried in order: the sponge cake first to get comfortable with batter, the tart shell second to practice pastry, and the lemon tart filling third to bring them together.
Quick reminders before your next bake:
- Soft butter for cakes, cold butter for pastry
- Blind bake every tart shell — no exceptions
- Cool everything on a wire rack, not on a flat surface
- Read the full recipe before you start
The global cakes and pastries market is growing because people love these things. Make some for yourself, and you’ll understand why.
Sources:
- GM Insights, Pastry and Cakes Market Size 2025-2034
- Business Research Company, Cake and Pastries Global Market Report 2026
- Wifitalents, 2026 Baking Statistics
- Puratos, Hottest Bakery Trends 2026
- Bakery and Snacks, Why Texture Is the New Flavor 2026
- Food Network, Why Did My Cake Sink in the Middle
- Paul Hollywood, Fixing Mistakes
- The Kitchn, Sponge Cake Recipe
Master cakes and tarts at home with step-by-step techniques, 3 beginner recipes, and pro fixes for the most common mistakes. 65% of Americans bake weekly.
Preheat your oven to 180°C / 350°F. Grease and line two 20cm round tins.
Beat butter and sugar together for at least 5 minutes until pale, fluffy, and almost white in colour. Don't rush this.
Add eggs one at a time, beating well after each. If the mixture looks curdled, add a spoonful of flour — this brings it back.
Fold in the flour gently using a large metal spoon or spatula. Fold, don't stir — you're preserving the air you worked hard to create.
Add vanilla and enough milk to bring the batter to a slow dropping consistency (it should fall off the spoon in 3-4 seconds).
Divide between tins and bake for 20-25 minutes. Don't open the oven in the first 15 minutes.
The cake is done when a skewer comes out clean and the surface springs back when pressed lightly.
Cool in the tins for 10-15 minutes, then transfer to a wire rack. Never cool a cake in a sealed tin — condensation makes the base sticky.

Pingback: Appalachian Apple Stack Cake: Step-by-Step Heritage Recipe